
Here is what happens between dropping a picture on Embossify and downloading an STL, and which controls change the result. Spoiler: no hamsters on wheels are involved.
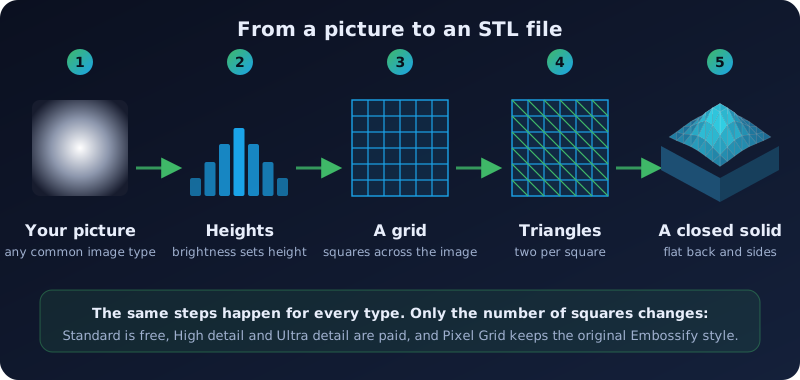
1. Brightness becomes height
Embossify reads your picture and treats every pixel's brightness as a height. White is the highest, black is the lowest, and the grays in between are the slopes. Turn on Invert depth and it flips: dark areas stand tall.
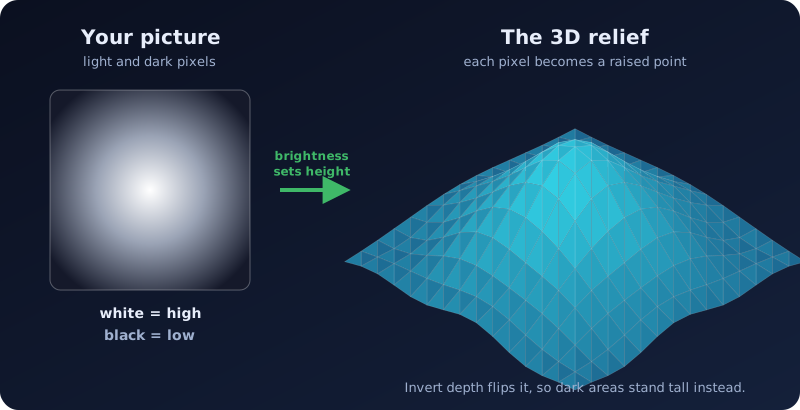
A color photo is judged by how bright each color looks to the eye, so green counts as brighter than blue. Under Your picture is, Auto chooses for you. A black and white picture, or a height map from terrain or sculpting software, is used exactly as drawn.
2. A grid of squares
The picture is divided into an even grid. Standard uses 200 squares across and is free. High detail uses 1,500 and Ultra detail 2,000, and those are paid. Pixel Grid keeps the original Embossify style, where each pixel becomes one square. A bigger picture is first shrunk to the grid, and High and Ultra average the pixels so the surface stays smooth.
3. Two triangles per square
Each square becomes two triangles, as explained in What Are Facets?. A flat back and sides close it up. The result is a closed solid with a flat back: it lies flat on a print bed and needs no supports.
4. The STL file
The finished file is a binary STL in millimeters. Every triangle faces outward and carries the right normal, and the surface is closed. We test this automatically with our own checks, so slicers and CAM programs should open the files without repair. A paid file can hold up to about 9 million triangles. You can look inside any STL, ours or yours, in the free Embossify Lens.
What you can change
- Size: width or height from 1 to 1,999 mm, in millimeters or inches. The other side follows your picture's shape, so nothing is stretched.
- Relief height and base thickness: how tall the picture rises, and how much solid material is under it.
- Flat frame: a clean border around the edge.
- Shapes and coins: cut the picture to a circle, a heart, a hex tile, a real coin size and more.
- Picture adjustments: contrast, smoothing, sharpening, black and white points, and terraces (flat steps instead of a smooth slope).
- Presets: one tap sets a sensible combination for Relief / CNC, 3D print, Lithophane, Wood carving, Portrait relief, Line art, and more.
The live preview updates as you change them, and it runs in your browser before anything is uploaded.
Free and paid
Every picture is converted for free first, so you always get the Standard file and can preview it in 3D. If you need more detail for a big print or a fine carving, you can choose a paid High detail, Ultra detail or Pixel Grid file, or use a volume code. See the comparison to judge whether you need it.