
There are two basic ways to make an object: build it up from nothing, or start with too much and cut the extra away. 3D printing does the first. CNC routing does the second. Think clay versus marble, only nobody has to wear a beret.
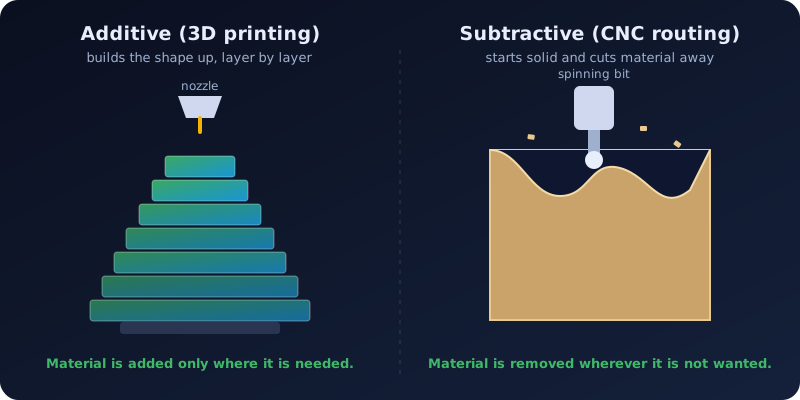
Additive: building up
Additive manufacturing makes a part layer by layer. Filament printers melt plastic through a nozzle, and resin printers harden liquid with light, but the idea is the same: material only goes where the part is.
- Handles shapes that are hard to cut, such as hollow parts and internal channels.
- Very little waste, apart from supports.
- Great for one-offs and quick changes: edit the file and print again.
Subtractive: carving away
Subtractive manufacturing starts with a block, sheet or bar and removes material with a cutting tool. A CNC router spins a bit and follows a path from your design. Lathes, mills and laser cutters also remove material.
- Works in real wood, metal, stone-like composites and solid plastic.
- Crisp edges and a smooth cut surface.
- Fast on flat or simple parts, but the tool has to physically reach every surface, so deep undercuts are out.
Side by side
| Additive (3D printing) | Subtractive (CNC) | |
|---|---|---|
| Starts with | Filament or liquid resin | A solid block or sheet |
| Typical materials | PLA, PETG, ABS, resin, nylon | Wood, MDF, acrylic, HDPE, foam, soft metals |
| Waste | Supports and failed prints | Chips and dust |
| Hard for it | Large smooth surfaces and very hard materials | Hollow insides and undercuts |
| Surface | Visible layers, unless post-processed | Tool marks that sand out |
| File | STL into a slicer | STL (or 2D drawings) into CAM software |
Where reliefs fit
A relief, such as a portrait carved into a board, is a natural fit for both. It has one detailed face and a flat back, so there are no undercuts and the router can reach everything. The same STL file can go either way:
- Choose the Relief / CNC preset to carve it: deep relief, no base.
- Choose the 3D print preset to print it: it adds a 1 mm solid base so every part of the picture prints.
Which should you use?
- A real wood sign or a heavy plaque? Carve it.
- A small keepsake, a lithophane, or something colorful? Print it.
- Need a mold? Many people carve a master and cast from it, or print a model and make a silicone mold of it.
Many workshops end up with both. Neither is better, they are good at different things.