
A lithophane is a picture you can feel. Hold it up to a light and a bumpy, ordinary-looking panel suddenly glows into a detailed photograph. It feels like a magic trick, and the trick is just physics.
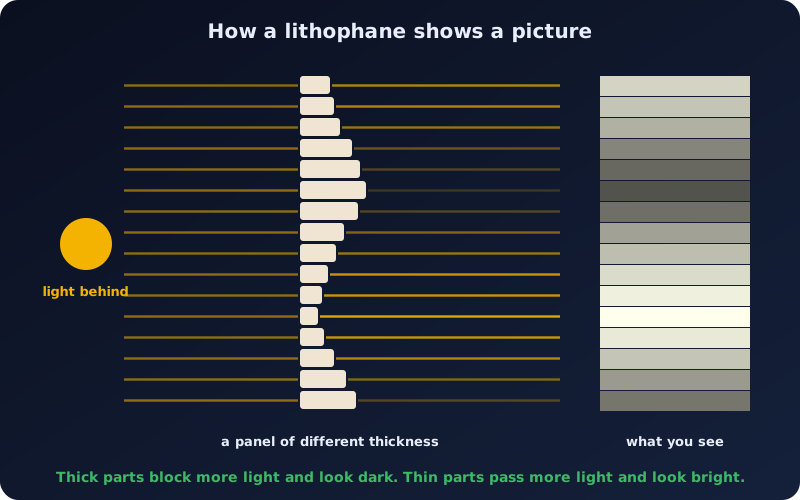
How a lithophane works
A lithophane is a thin, semi-translucent panel whose thickness varies across its face:
- Thin areas let more light through, so they look bright.
- Thick areas block more light, so they look dark.
With a light behind it, those differences rebuild the light and shade of the original picture. With the light off, you just see a gently embossed surface.
This is the opposite of a normal relief, where bright areas rise up. For a lithophane, bright areas must be thin. That is why Embossify's Lithophane preset turns on Invert depth.
A short history
Lithophanes appeared in the 1820s in Europe and became popular decorations in the mid-1800s, especially from porcelain makers in Germany and France. An artist carved the image into wax, a mold was made from it, and thin, unglazed white porcelain was cast and fired. They were hung in windows, set in lamp shades, and built into teacups and candle screens. The name comes from Greek words meaning "light" and "stone".
Making one in 3D
- Choose a picture. Faces, pets and clear landscapes work well. Plenty of contrast and a simple background help.
- Convert it to an STL. In the Embossify converter pick the Lithophane preset. It makes a flat panel, 100 mm wide, whose thickness runs from 0.8 mm in the lightest areas to about 3.2 mm in the darkest. Auto-contrast is on to use that whole range. The Night light preset is a thinner panel for a small LED.
- Print it. Use white or natural filament, and a fine layer height. Many people print lithophanes standing upright, which tends to give the cleanest detail. A very high infill, or a slicer setting that makes the panel solid, helps the light spread evenly.
- Light it from behind. A window, a phone screen or an LED panel works.
A filament printer is fine. A resin printer can show even more detail, because the layers are thinner. See stereolithography.
Tips for a great result
- Test small first. A quick small print shows whether the picture has enough contrast.
- Use a bright, even light. A weak or uneven light hides detail.
- White filament gives the clearest picture. Colored filament tints it.
- Do not make it too thin. Panels under about 0.6 mm can print poorly. If the bright areas look washed out, add a little base thickness under Advanced so the lightest parts are not so thin.
- Flat, not curved. Embossify makes flat panels. Curved or round lithophanes, such as lamp shades, need specialist software.
What people make
- Night lights and window hangings
- Gifts for weddings and anniversaries, and pet portraits
- Memorial keepsakes and family photos
- Lamp panels, with warm LED strips behind them